Categories
Sculpture

PLASTER – Heads

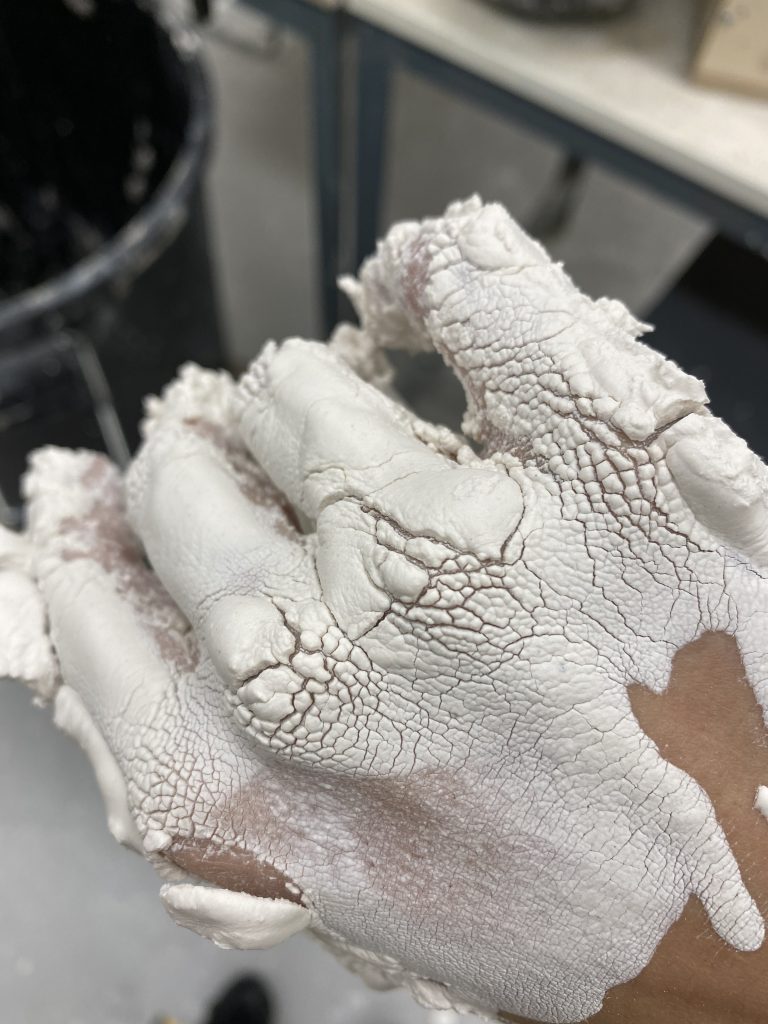
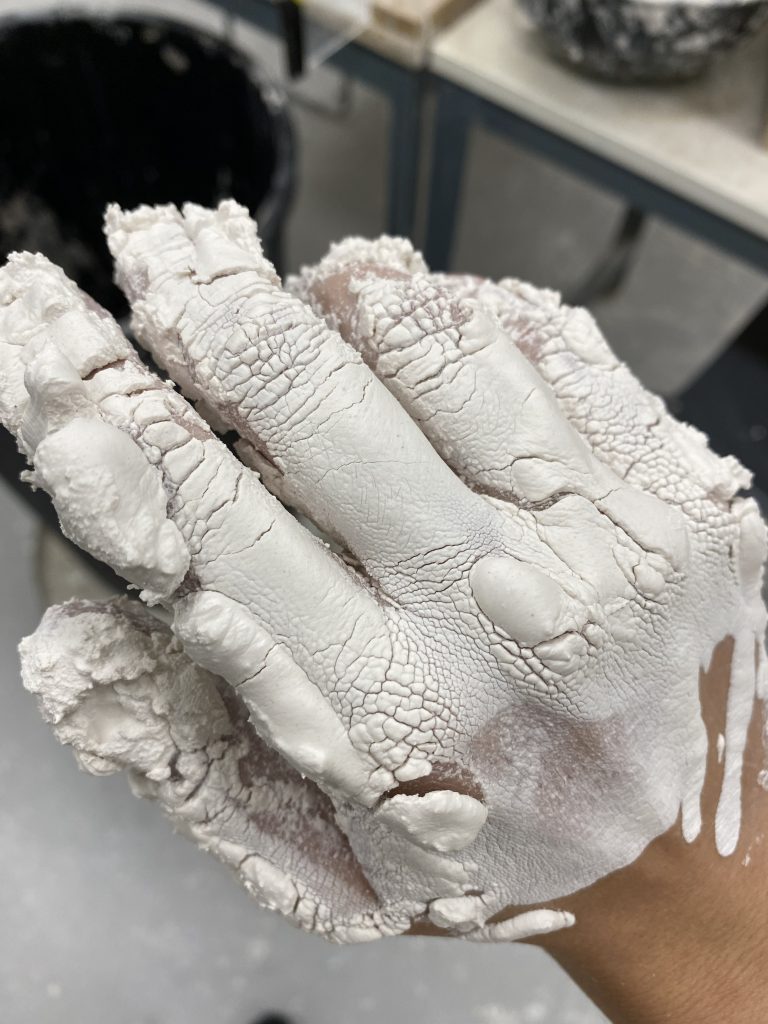
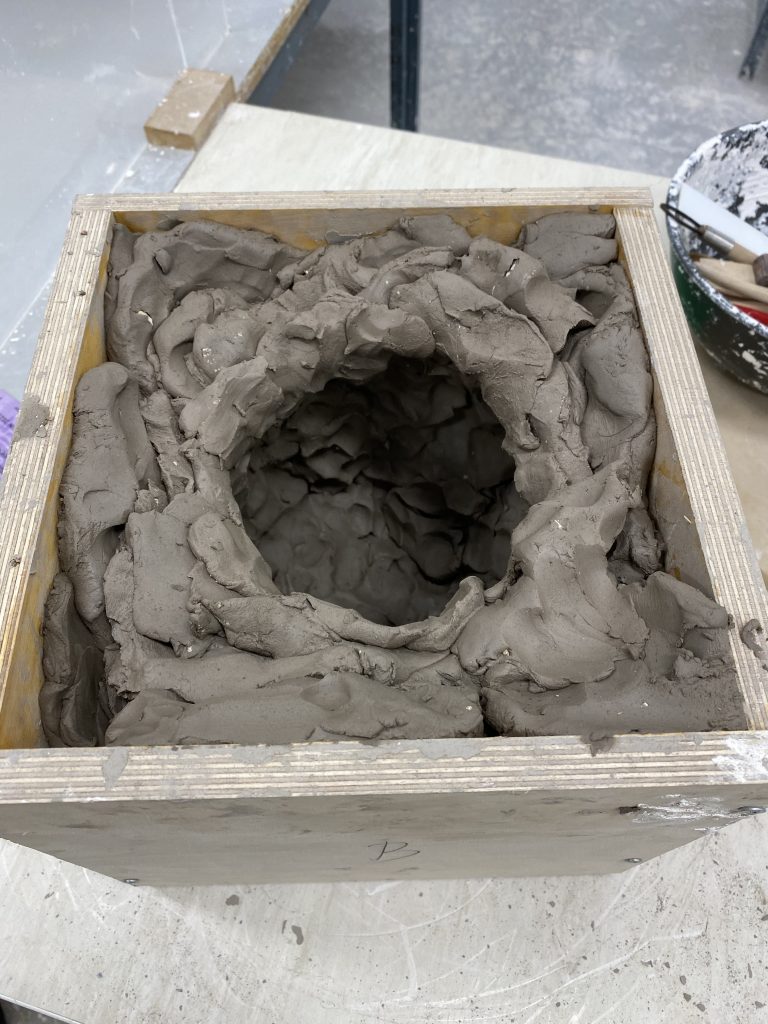
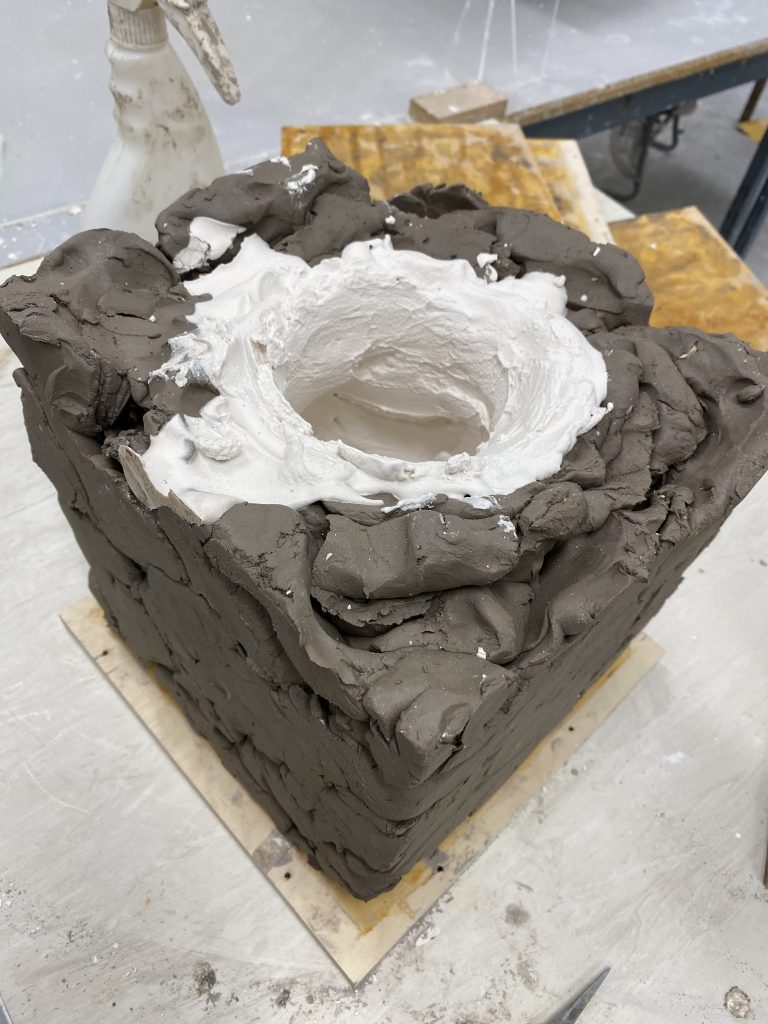
For the heads I made out of potters plaster I firstly started off with constructing a box made of wood. I had to measure my head to get the right sizes and dimensions, once I had made the box in the wood workshop I then began molding the clay in the box. I began slapping the clay in the box trying to get as much as a I could in there.

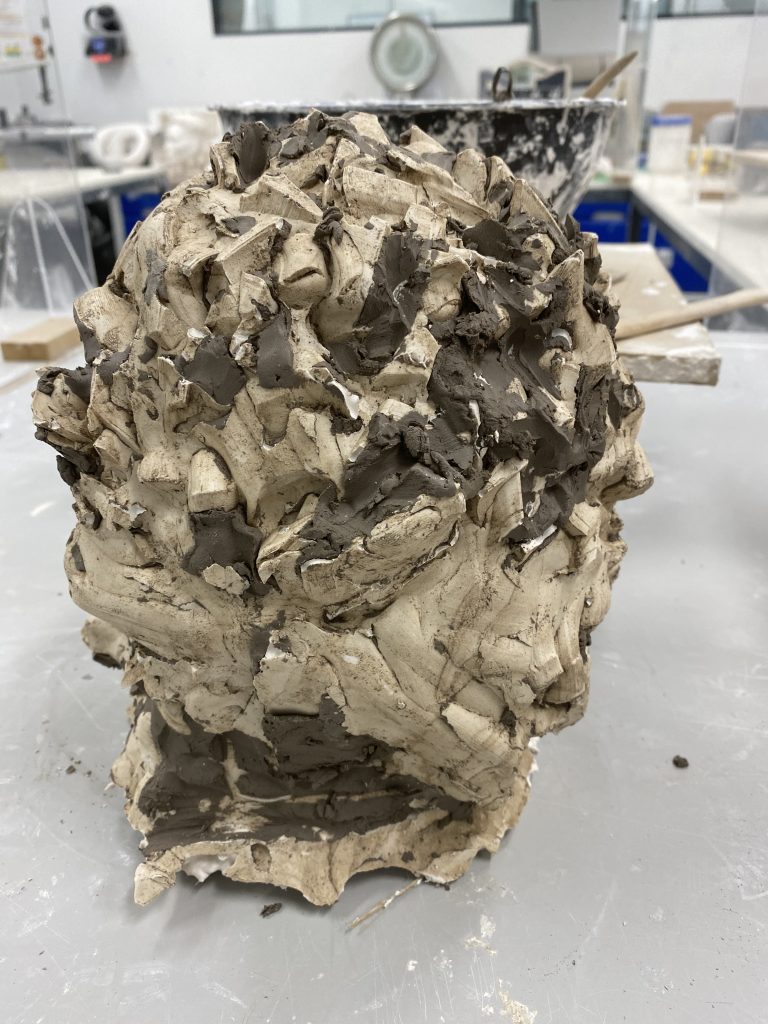
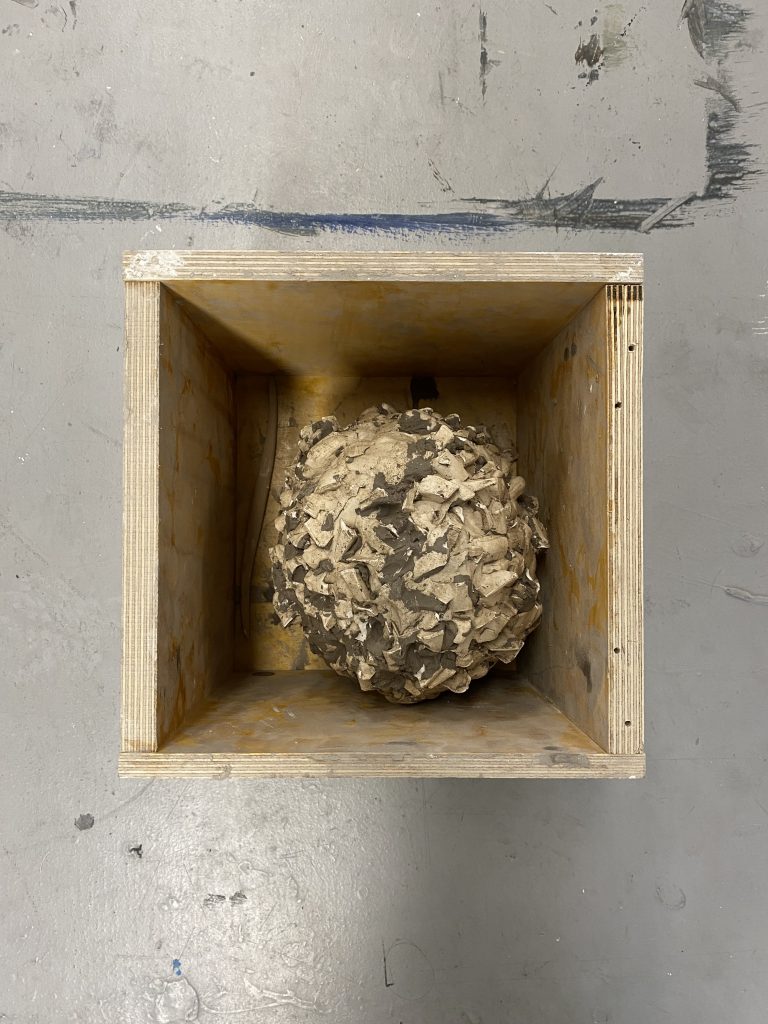
Here is my first attempt of creating a head with plaster in the box that I had made. I didn’t really like the outcome as its not what I had thought it would look like, however trying to create a head in a box with clay was quite a challenge as I had to mold the head upside down. I wanted to create something abstract so instead of using all of the tools I decided to use mainly my hands and fingers to mold the clay, I believe it was effective and abstract as it doesn’t look like a normal head it looks kind of scary looking, one thing that I did not like about this head is the face and how sharp and pointy some of the edges are this was due to me using my fingers and a wooden stick. However even though I did not like the outcome once I put the plaster head back into the box it became more interesting almost as if the box was the house for the head.

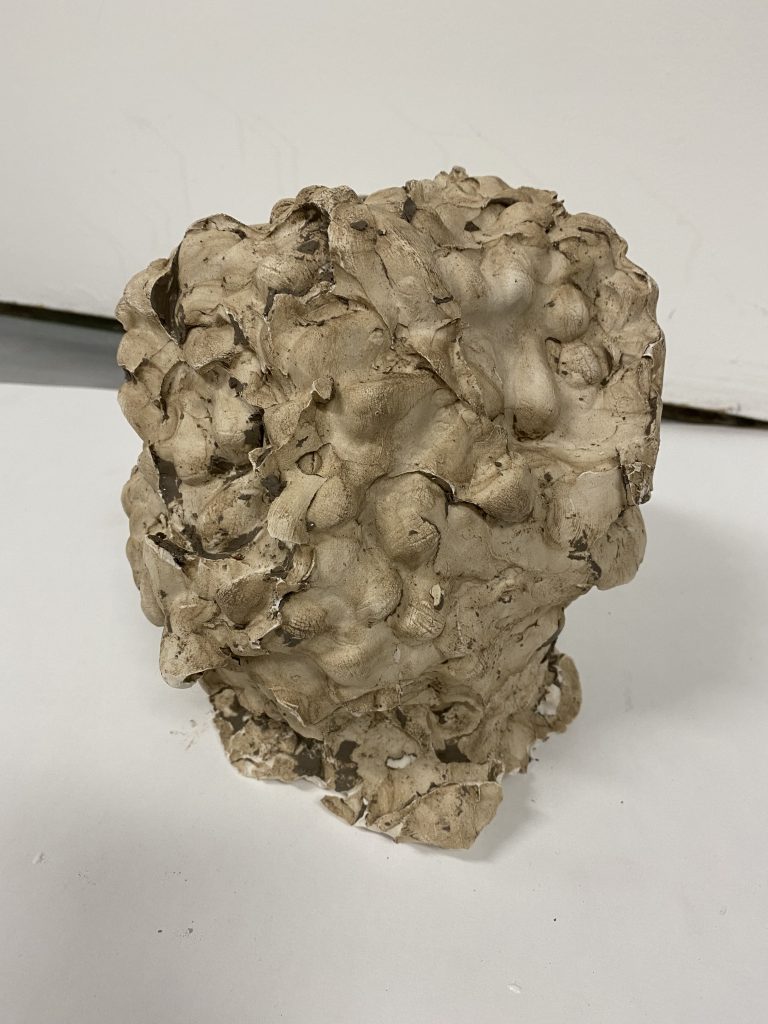
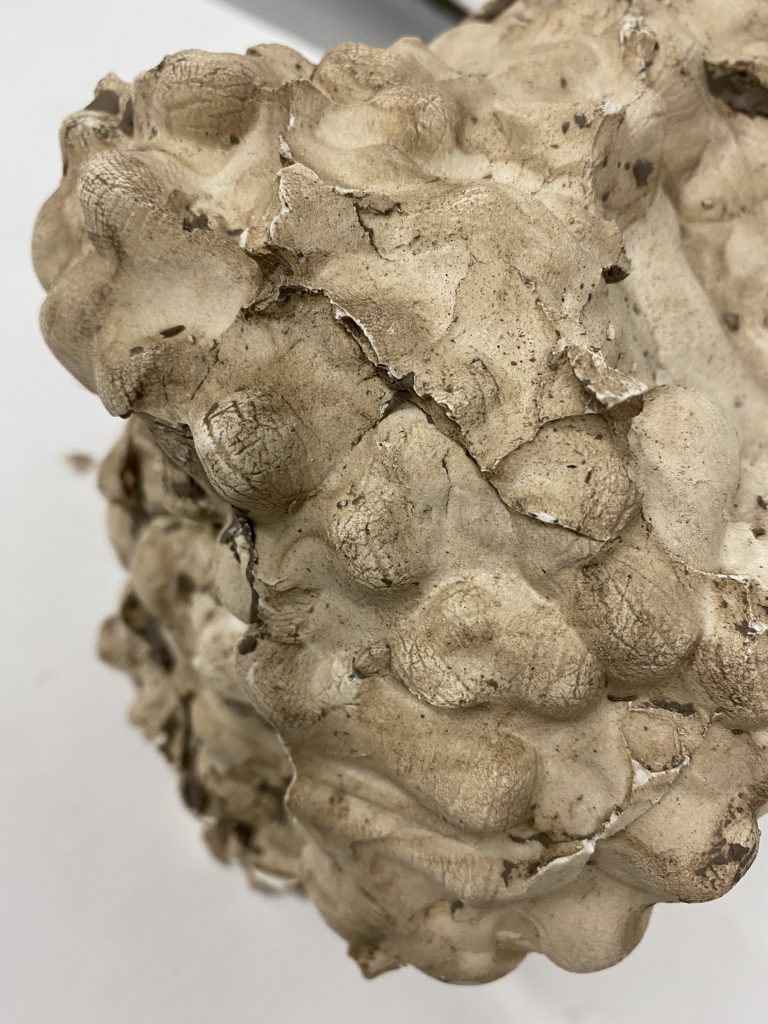
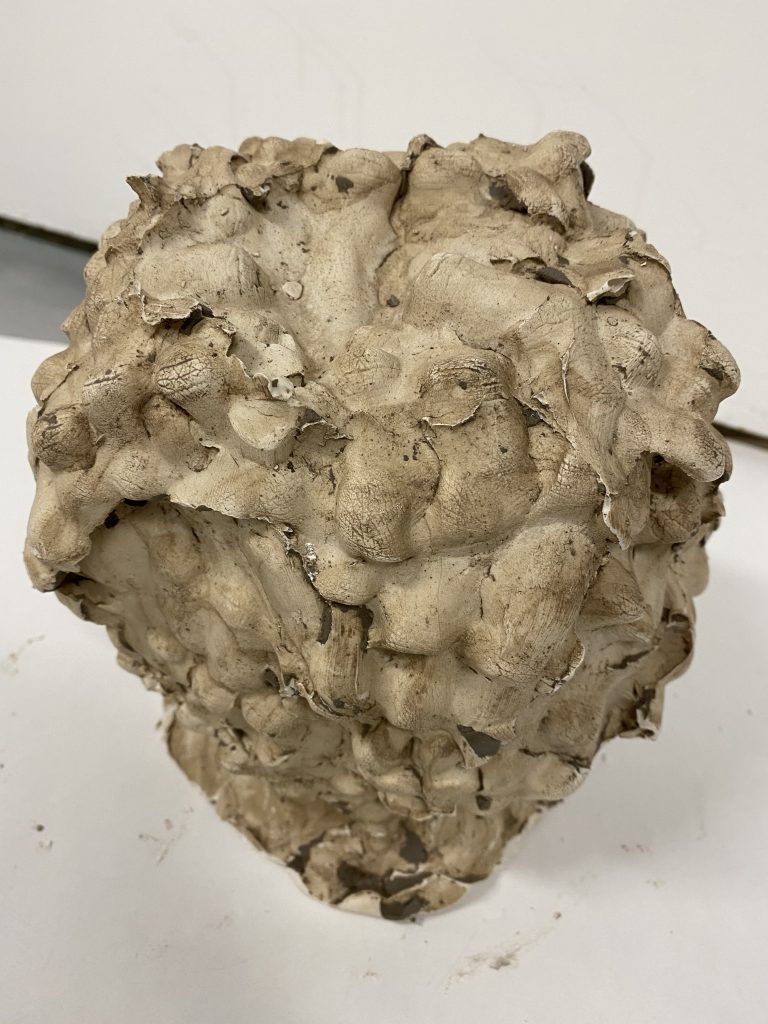
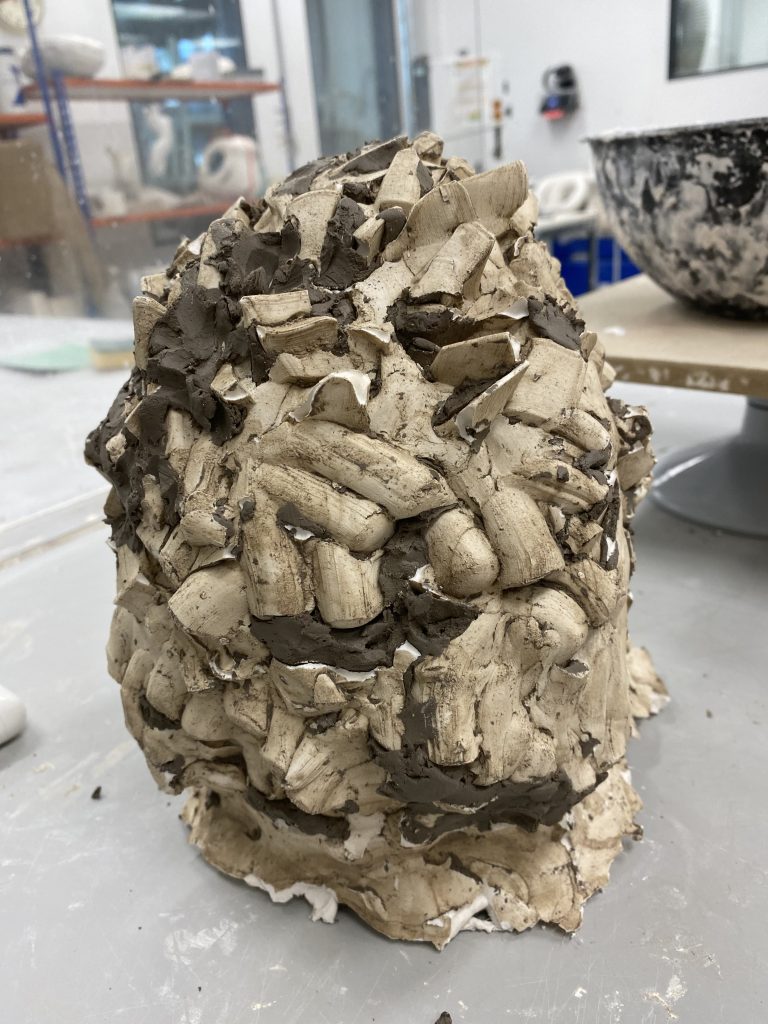
Here is my second attempt of using the box to create a head out of plaster. I was pleased with the outcome of this head compared to the first one this is because instead of using my fingers I decided to use my knuckles leaving the edges more round instead of sharp and pointy. I also decided to put lumps of clay in the mold to make the head a different shape as you can see there are some parts of the head that looks like there is a dent in it, I did this because I didn’t want the head to be just one big circular shape. I also didn’t carve a face into this head this was because I thought that using my knuckles would kind of create a face in its own way, and I believe it did, as you can see in the first picture out of these four images it looks like a side profile of some ones head.

Categories
Sculpture

DEVELOPMENT – Twine Heads

Instead of leaving the twine heads how they were I decided to develop them even further.

For one of the heads I decided to develop it even further, and glue cigarettes butts on to the twine and the reason I decided to do this was because it has been an idea of mine for a while, also it had a meaning behind it. The meaning and reason I decided to glue cigarette butts on to the twine is to portray the fact that in todays society many people are very quick to shut you down (stub out) and the fact that many people are very quick to judge a person, so I thought that the cigarette butts were a good way to portray this, especially because they have been used and have been stubbed out.

So the idea of the cigarette butt is portray that within todays society no matter how old you are or where you are, there are many people that look down upon you and can be very harsh on each other. So its kind of like a metaphor the idea that smoking can be very addictive and repetitive, implying that people can be the exact same.

For the second head I decided to hang red string onto the twine, to follow on from the first head and to portray that once people ‘stub you out’ this then leads to a lot of emotion such as anger. I used the colour red to show this as the colour red portrays many things such as anger, blood or danger.

Following on from the second head that portrays anger, I then decided to use flowers and leaves I found outside to show that no matter what people always shine and blossom no matter the circumstances people sometimes come out on top.

Categories
Sculpture

HEADS – Cotton Twine

To make these cotton twine heads I started off with a plastic bag round my head, and getting someone to then apply masking tape over the plastic bag so then this would give me a head shaped ball. After creating the head form I then decided mix up flour and water creating a sticky glue that would hold all this twine together.

There was a few issues with using the flour and water, for example the glue didn’t stick the twine all together straight away so some of the twine would slip off and move position. To start off the process of wrapping the twine around I had to get a hot glue gun to stick the twine onto the head instead of using the glue mixture I had made, this was because the mixture was not strong or thick enough. After using the hot glue gun to stick the end bit of twine down I then began the process of wrapping it round the head multiple times. I had to put the twine in the bowl of glue I had made before wrapping it around the head so that bits of the twine would stick together.

After wrapping the twine around the head I then used my hands to apply the glue, I did this so that the glue would get into all the sections, making sure that it would all stick together and not fall apart after taking the tape out. Another issue I had was when I applied the glue to the head, the masking tape got rather soggy and wet which made the head change shape and it started to collapse because the glue was so heavy. However I didn’t mind as I wanted all three heads to look completely different and sort of distorted.

Final Outcome

Once the all three heads were dry I then had to remove the tape from inside which was kind of tricky as I didn’t want to ruin the sculpture or pick off any of the hard glue which was keeping the twine stuck together. I then decided to attach the three heads with a bit of string onto a stick to make it look like they were floating. The reason why I didn’t make the string that attached the heads to the stick the same length was because I thought they looked more effective and intriguing when they hung at different lengths.